Account & Settings
Team Management
Learn how to invite team members and manage roles
CheckStatus allows you to invite team members to help manage your status pages and incidents. This guide covers how to add, manage, and remove team members.
Team Member Roles
CheckStatus has two team member roles:
| Role | Capabilities |
|---|---|
| Admin | Full access to all features, including billing and team management |
| Member | Can manage status pages, components, incidents, and maintenance |
Admin Capabilities
Admins can:
- Create and manage status pages
- Manage components and incidents
- Schedule maintenance
- Invite and remove team members
- Access billing and subscription settings
- View and manage subscribers
- Configure account settings
Member Capabilities
Members can:
- Create and manage status pages
- Manage components and incidents
- Schedule maintenance
- View subscribers
- Cannot access billing or team management
Inviting Team Members
To invite a new team member:
- Click your profile icon in the top-right corner
- Select Accounts
- Click on the account you want to add members to
- Click Invite A User
- Enter their Name and Email
- Select their role(s) by checking Admin and/or Member
- Click Send invitation
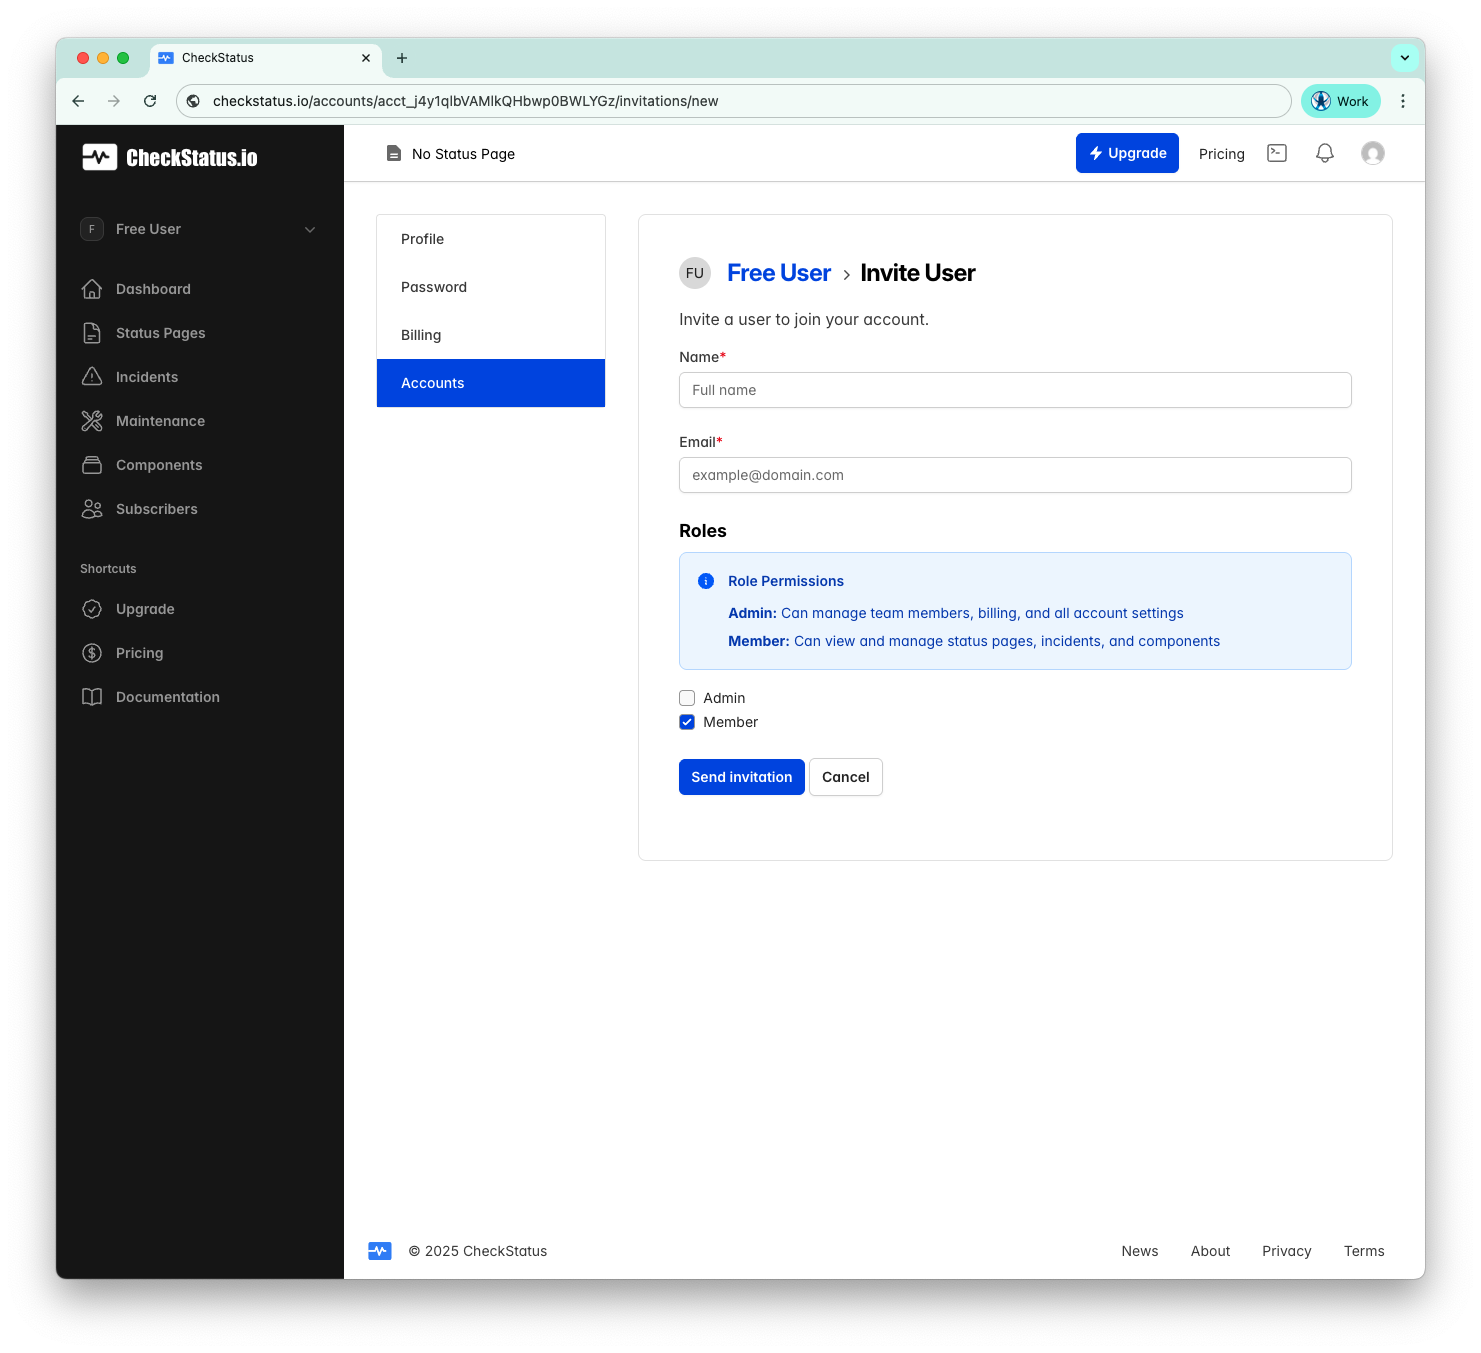
Note: The Member role is selected by default. You can assign both Admin and Member roles to the same user.
Role Permissions
When inviting a user, you'll see a helpful summary:
- Admin: Can manage team members, billing, and all account settings
- Member: Can view and manage status pages, incidents, and components
Invitation Process
- Invitation sent: The invitee receives an email with an invitation link
- Accept invitation: They click the link and create an account (or sign in if they have one)
- Join team: They're added to your account with the assigned role
Invitations expire after 7 days. If an invitation expires, you'll need to send a new one.
Managing Team Members
Viewing Team Members
- Click your profile icon in the top-right corner
- Select Accounts
- Click on an account
- View the Team Members section showing all members and their roles
The page displays:
- Current member count (e.g., "1 of 100 team members")
- A table with each member's name and roles (Owner, Admin, Member)
- An Edit button for each member
Changing Roles
To change a team member's role:
- Click your profile icon in the top-right corner
- Select Accounts
- Click on an account
- Find the team member and click Edit
- Check or uncheck the Admin and Member checkboxes
- Click Update Account user
Note: You cannot change your own role. Another admin must do it for you. The account owner's Admin role cannot be removed.
Removing Team Members
To remove a team member from your account:
- Click your profile icon in the top-right corner
- Select Accounts
- Click on an account
- Find the team member and click Edit
- Click the remove/delete option
- Confirm the removal
When you remove a team member:
- They lose access to your account immediately
- They can no longer view or manage your status pages
- They can still access any other accounts they belong to
Warning: Removing a team member is immediate and cannot be undone. You would need to re-invite them to restore access.
Team Member Limits by Plan
The number of team members depends on your plan:
| Plan | Team Members |
|---|---|
| Free | 2 |
| Starter | 5 |
| Growth | 10 |
| Pro | 100 |
The count includes:
- The account owner
- All admins
- All members
Pending invitations count toward your limit.
Account Owner
The account owner is a special role with additional capabilities:
- Transfer account ownership to another member
- Delete the account
- Always has admin privileges
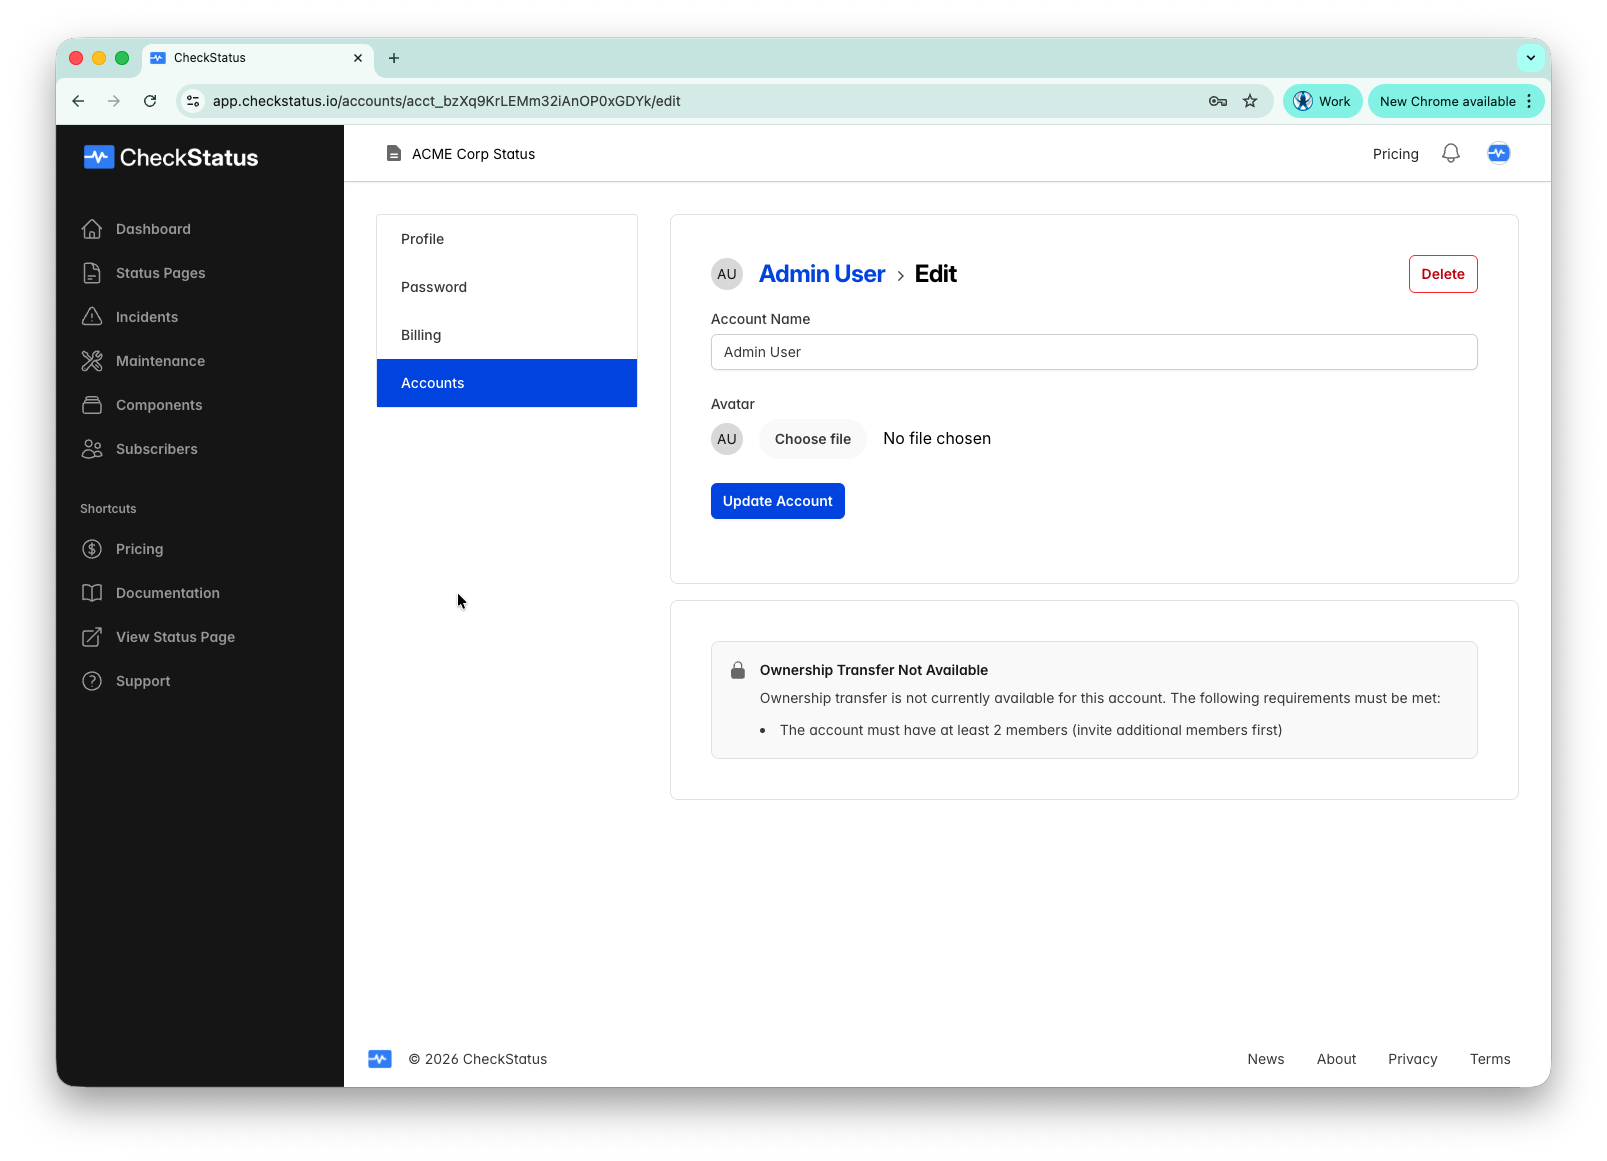
Transferring Ownership
To transfer account ownership:
- Click your profile icon in the top-right corner
- Select Accounts
- Click on the account
- Click Edit Account
- In the Ownership Transfer section, select the new owner
- Confirm the transfer
Note: Ownership transfer requires at least 2 members in the account. The new owner will have full control, including billing.
Best Practices
Role Assignment
- Use Admin sparingly: Only give admin access to people who need billing or team management access
- Default to Member: Most team members only need member-level access
- Account owner: Keep this with someone who has long-term responsibility for the account
Team Security
- Regularly review team member access
- Remove team members who no longer need access
- Encourage team members to enable two-factor authentication
- Use strong, unique passwords
Onboarding New Members
When adding a new team member:
- Start with the Member role
- Show them how to navigate the dashboard
- Walk through creating incidents and updates
- Explain your team's communication guidelines
Troubleshooting
Invitation Not Received
If a team member doesn't receive the invitation:
- Check their spam or junk folder
- Verify the email address is correct
- Resend the invitation
- Ask them to add your domain to their safe senders list
Cannot Remove Member
If you can't remove a team member:
- You cannot remove yourself
- You cannot remove the account owner
- You must be an admin to remove members
Cannot Transfer Ownership
If ownership transfer is not available:
- Ensure the account has at least 2 members
- Invite additional members first before transferring
Related Topics
- Account Setup - Configure your account
- Notifications - Set up team notifications