Features
Components
Learn how to add and manage components to track your service health
Components represent the individual parts of your service that you want to track and display on your status page. They help your customers understand which specific areas of your service may be affected during an incident.
What are Components?
Components are the building blocks of your status page. They represent different services, systems, or features that make up your product. Common examples include:
- API - Your REST or GraphQL API
- Website - Your main web application
- Dashboard - Customer-facing dashboard
- Mobile App - iOS and Android applications
- Database - Data storage systems
- Payment Processing - Billing and payment systems
- Email Service - Transactional email delivery
- CDN - Content delivery network
Each component has its own status that is automatically derived from active incidents and scheduled maintenance.
Component Statuses
Component status is automatically determined based on active incidents and scheduled maintenance. Components can have one of five statuses:
| Status | Color | Description | Triggered By |
|---|---|---|---|
| Operational | Green | The component is working normally | No active incidents or maintenance |
| Degraded Performance | Yellow | The component is working but slower or less reliable than usual | Minor impact incident |
| Partial Outage | Orange | Some functionality of the component is unavailable | Major impact incident |
| Major Outage | Red | The component is completely unavailable | Critical impact incident |
| Under Maintenance | Blue | Scheduled maintenance is in progress | Active scheduled maintenance |
Note: Component status cannot be changed manually. It is automatically derived from incidents and maintenance to ensure accuracy and consistency.
Creating Components
To add a new component:
- Click Components in the sidebar
- Click Add Component
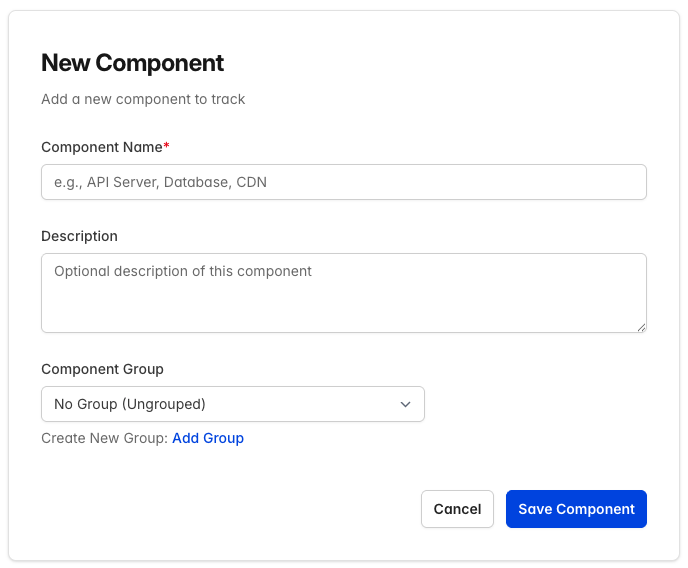
- Fill in the component details:
- Name: A clear, descriptive name
- Description: Optional details about what this component does
- Component Group: Optionally assign to a group
- Click Save Component
New components start with an Operational status. The status will automatically change when you create incidents or schedule maintenance that affects the component.
Editing Components
To update a component's details:
- Click Components in the sidebar
- Find the component you want to edit
- Click the edit icon (pencil) on the component row
- Update the name, description, or group assignment
- Click Save Component
Tip: To change a component's status, create an incident or schedule maintenance that affects the component. Learn more about incidents →
Deleting Components
To delete a component:
- Click Components in the sidebar
- Find the component you want to delete
- Click the delete icon (trash) on the component row
- Confirm the deletion
Warning: Deleting a component is permanent and will remove all associated uptime history.
Component Groups
Component groups help you organize related components together. For example, you might group components by:
- Infrastructure - Servers, databases, networking
- Customer-Facing - Website, mobile app, dashboard
- Third-Party Services - Payment processors, email providers
Creating a Component Group
- Click Components in the sidebar
- Click Add Group
- Enter a group name and optional description
- Click Save Group
Assigning Components to Groups
When creating or editing a component, select the desired group from the Component Group dropdown.
Components that aren't assigned to a group will appear in an "Ungrouped" section on your status page.
Deleting a Component Group
To delete a component group:
- Click Components in the sidebar
- Find the group you want to delete
- Click the delete icon (trash) on the group header row
- Confirm the deletion
Note: Deleting a group does not delete the components within it. Components will be moved to the "Ungrouped" section.
Reordering Components
You can control the order in which components appear on your status page:
- Click Components in the sidebar
- Drag and drop components to reorder them
- Components within groups can be reordered independently
Uptime Tracking
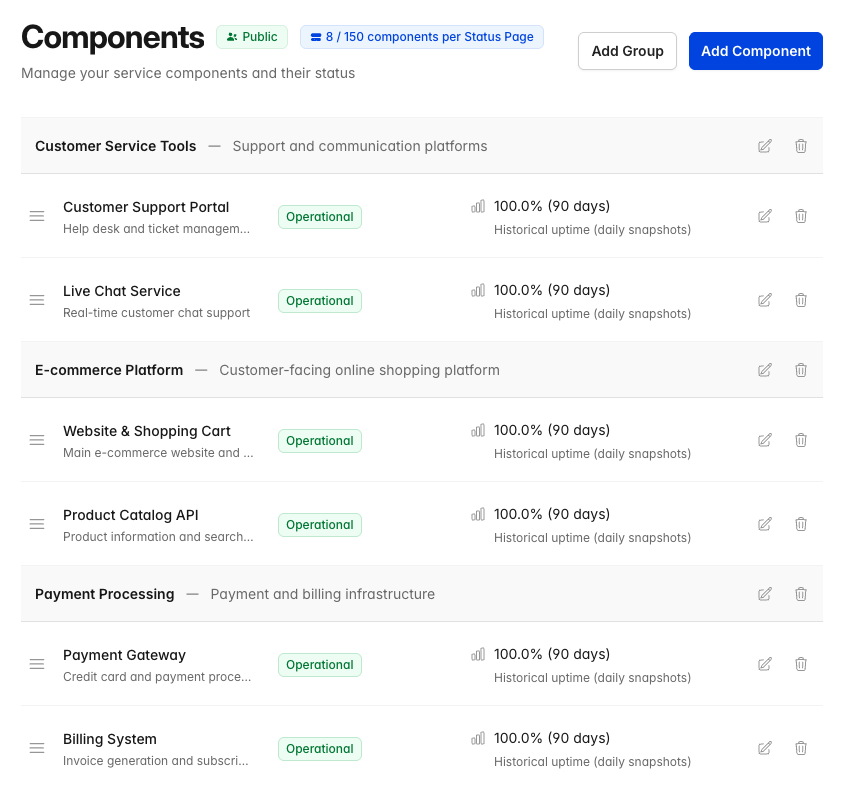
CheckStatus automatically tracks the uptime of each component based on status changes. On your public status page, visitors can see:
- Current Status: The component's current operational state
- Uptime Percentage: The percentage of time the component was operational over the past 90 days
- Status History: A visual timeline showing status changes
How Uptime is Calculated
Uptime percentage is calculated as:
Uptime % = (Time Operational / Total Time) × 100
The calculation considers:
- Operational: Counts as 100% uptime
- Degraded Performance: Counts as 100% uptime (the service is still available)
- Partial Outage: Counts as 50% uptime
- Major Outage: Counts as 0% uptime
- Under Maintenance: Excluded from uptime calculations
Note: Uptime tracking requires at least 2 days of data before percentages are displayed.
How Component Status Works
Component status is automatically managed through incidents and scheduled maintenance:
When an Incident is Created
When you create an incident and select affected components:
- Each component's status is automatically updated based on the incident's impact level
- The status change is recorded in the component's uptime history
- The public status page reflects the new status immediately
| Incident Impact | Component Status |
|---|---|
| Minor | Degraded Performance |
| Major | Partial Outage |
| Critical | Major Outage |
When an Incident is Resolved
When all incidents affecting a component are resolved:
- The component automatically returns to Operational status
- If multiple incidents affect a component, the most severe impact determines the status
- The component only returns to Operational when all incidents are resolved
During Scheduled Maintenance
When scheduled maintenance starts:
- Affected components are set to Under Maintenance status, even if incidents are active
- When maintenance completes or is cancelled, components return to Operational unless incidents are still active, in which case the incident status is restored
| Learn more about incidents → | Learn more about maintenance → |
Component Limits by Plan
The number of components per status page depends on your plan:
| Plan | Components per Status Page |
|---|---|
| Free | 5 |
| Starter | 20 |
| Growth | 50 |
| Pro | 150 |
Best Practices
Naming Components
- Use clear, customer-friendly names
- Avoid internal jargon or technical terms
- Keep names concise but descriptive
Organizing Components
- Group related components together
- Put the most important components first
- Consider your customers' perspective when organizing
Maintaining Accuracy
- Create incidents promptly when issues occur to update component status
- Resolve incidents when issues are fixed to restore component status
- Review and clean up unused components regularly
- Keep descriptions up to date
Related Topics
- Status Pages - Overview of status pages
- Incidents - Report issues affecting components
- Scheduled Maintenance - Plan maintenance windows