Getting Started
Quick Start Guide
Get up and running with CheckStatus in 5 minutes
This guide will help you create your first status page in just a few minutes. By the end, you'll have a fully functional public status page ready to share with your customers.
Prerequisites
Before you begin, make sure you have:
- A CheckStatus account (don't have one? Sign up here)
- Admin access to your account
Step 1: Create Your First Status Page
After signing in, you'll land on your dashboard. Let's create your first status page.
New Account (No Status Pages Yet)
If you haven't created any status pages yet, you'll see a "No Status Pages Yet" banner on your dashboard:
- Click the Create Your First Status Page button on the banner
- The Create New Status Page Wizard will guide you through the setup
Existing Account (Adding Another Status Page)
If you already have status pages and want to add another:
- Click Status Pages in the sidebar
- Click Create Status Page
Complete the Wizard
The wizard walks you through configuring your status page:
- Status Page - Set your page name, subdomain, and basic settings
- Components - Choose a Quick Start Template or add your own services to monitor
- Notifications - Configure how subscribers receive alerts
- Branding - Upload your logo, set colors, and customize appearance
Click Create Status Page when you're done.
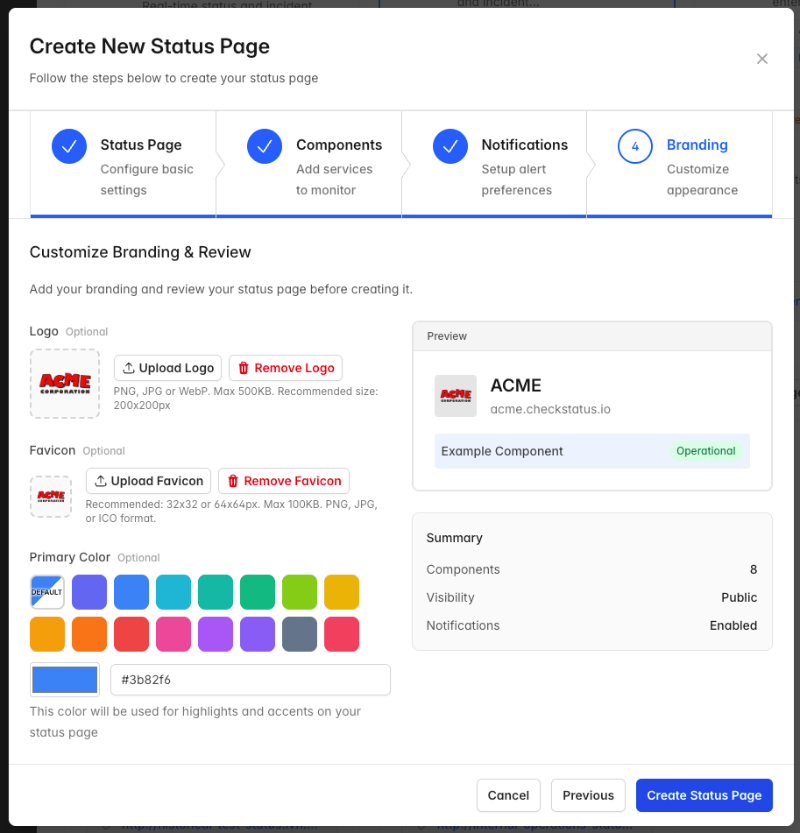
Your status page is now live and accessible at your subdomain (e.g., yourcompany.checkstatus.io).
Step 2: Add More Components
You added some components during the wizard, but you can add more at any time. Common components include:
- API
- Website
- Dashboard
- Mobile App
- Payment Processing
- Database
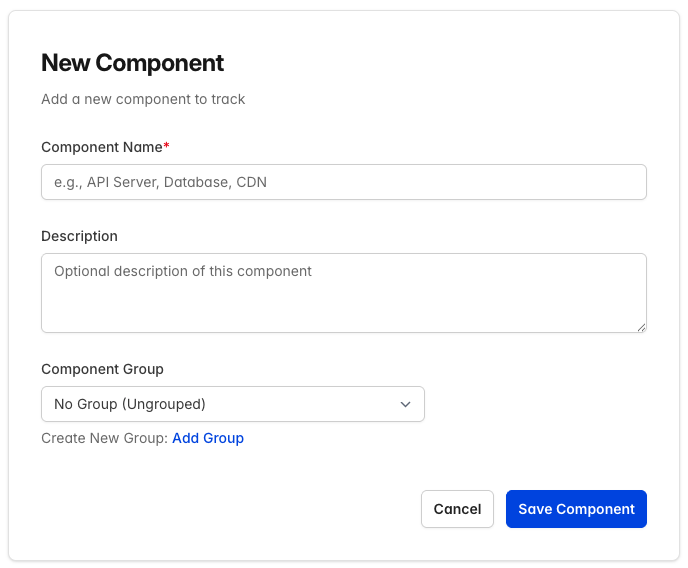
To add a component:
- From your status page, click Components in the sidebar
- Click Add Component
- Enter the component details:
- Name: The name of the component (e.g., "API")
- Description: A brief description (optional)
- Status: The current status (defaults to Operational)
- Component Group: The group this component belongs to (optional)
- Click Save Component
Repeat this process for each part of your service you want to monitor.
Component Statuses
Each component can have one of the following statuses:
| Status | Description |
|---|---|
| Operational | Everything is working normally |
| Degraded Performance | The component is working but slower than usual |
| Partial Outage | Some functionality is unavailable |
| Major Outage | The component is completely unavailable |
| Under Maintenance | Scheduled maintenance is in progress |
Step 3: Organize with Component Groups (Optional)
If you have many components, you can organize them into groups:
- Click Components in the sidebar
- Click Add Group
- Enter a name for the group (e.g., "Infrastructure" or "Customer-Facing")
- Enter a description (optional)
- Click Save Group
- Drag and drop components into the group to organize them
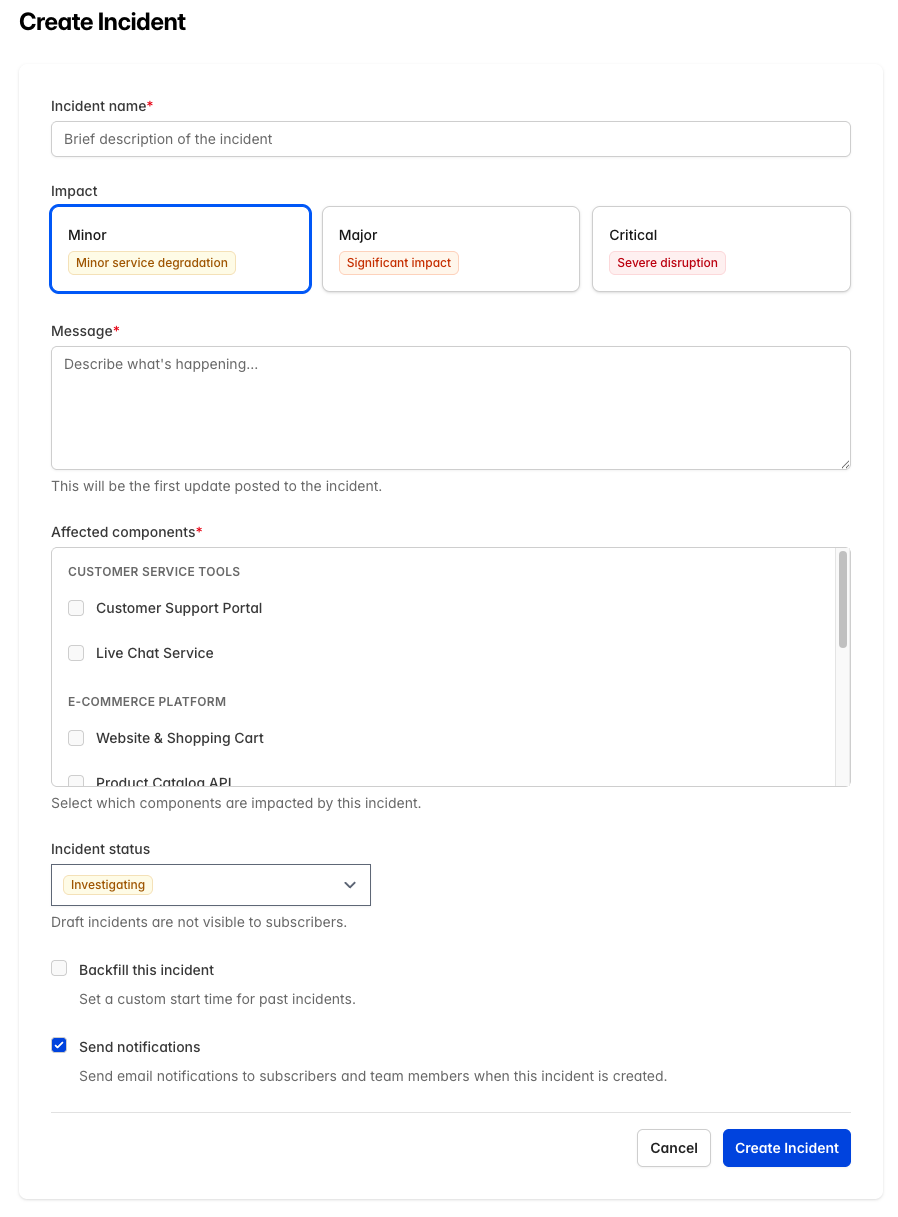
Step 4: Report Your First Incident
When something goes wrong, create an incident to notify your users:
- Click Incidents in the sidebar (or use the Create Incident quick action on the Dashboard)
- Click Create Incident
- Fill in the incident details:
- Incident Name: A brief description (e.g., "API Slowdowns")
- Impact: How severely this affects users (Minor, Major, or Critical)
- Message: Details about what's happening
- Affected Components: Select which components are impacted
- Incident Status: Choose the initial status (Draft, Investigating, Identified, or Monitoring)
- Optionally configure:
- Backfill: Set a past start time if reporting a previous incident
- Notify Subscribers: Check to send email notifications
- Click Create Incident
Tip: Draft incidents are not visible to subscribers until you change the status.
Incident Statuses
Incidents progress through these statuses:
- Investigating - You're looking into the issue
- Identified - You've found the cause
- Monitoring - A fix is in place, you're watching for issues
- Resolved - The incident is fully resolved
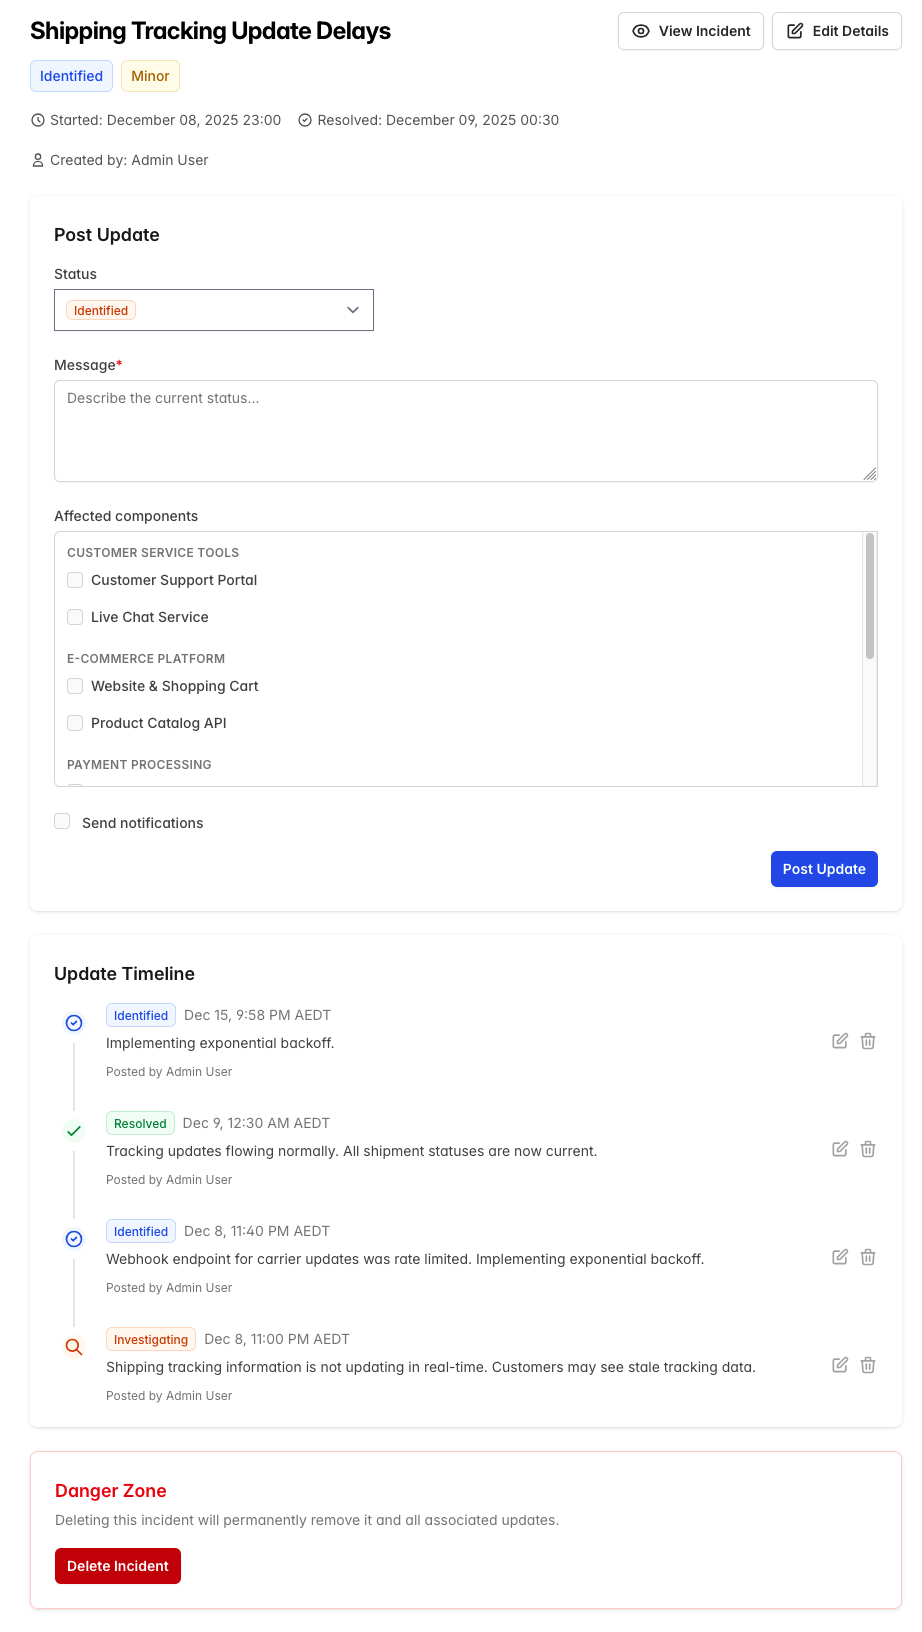
Adding Incident Updates
As you work on resolving the incident, keep your customers informed. Edit an incident from the Incidents list to access two options:
Post an Update (left panel)
- Select the new Status (Investigating, Identified, Monitoring, or Resolved)
- Enter your Message describing the current situation
- Check Notify team members if needed
- Click Post Update
Edit Incident Details (right panel)
- Update the incident name, impact level, or affected components
- Click Save Changes
Step 5: Customize Your Status Page
Make your status page match your brand:
- Click Status Pages in the sidebar
- Click Edit on the status page card
- Scroll to the Branding & Appearance section
- Customize your status page:
- Upload your logo
- Upload a favicon
- Choose your primary color
- Click Save Changes
Step 6: Share Your Status Page
Your status page is now live! Share it with your customers:
- Direct Link: Visit your subdomain (e.g.,
acme.checkstatus.io) - Website Link: Add a link to your status page in your app or website footer
- Email Subscriptions: Customers can subscribe to receive email updates
What's Next?
Now that you have a basic status page, explore these features:
- Schedule Maintenance - Plan maintenance windows in advance
- Manage Subscribers - See who's subscribed to updates
- Invite Your Team - Add team members to help manage incidents
- Set Up Notifications - Configure email and webhook notifications
Getting Help
Need assistance? We're here to help:
- FAQ - Find answers to common questions
- Contact Support - Reach out to our team